Notes - Account and Claim Level
About notes
Notes can be added on the claim, account, or the facility.
Account: When you are on the Account page, you can add a note about the account only.

Claim: If you are on the Claim page, you can add a note about the claim and/or the account.

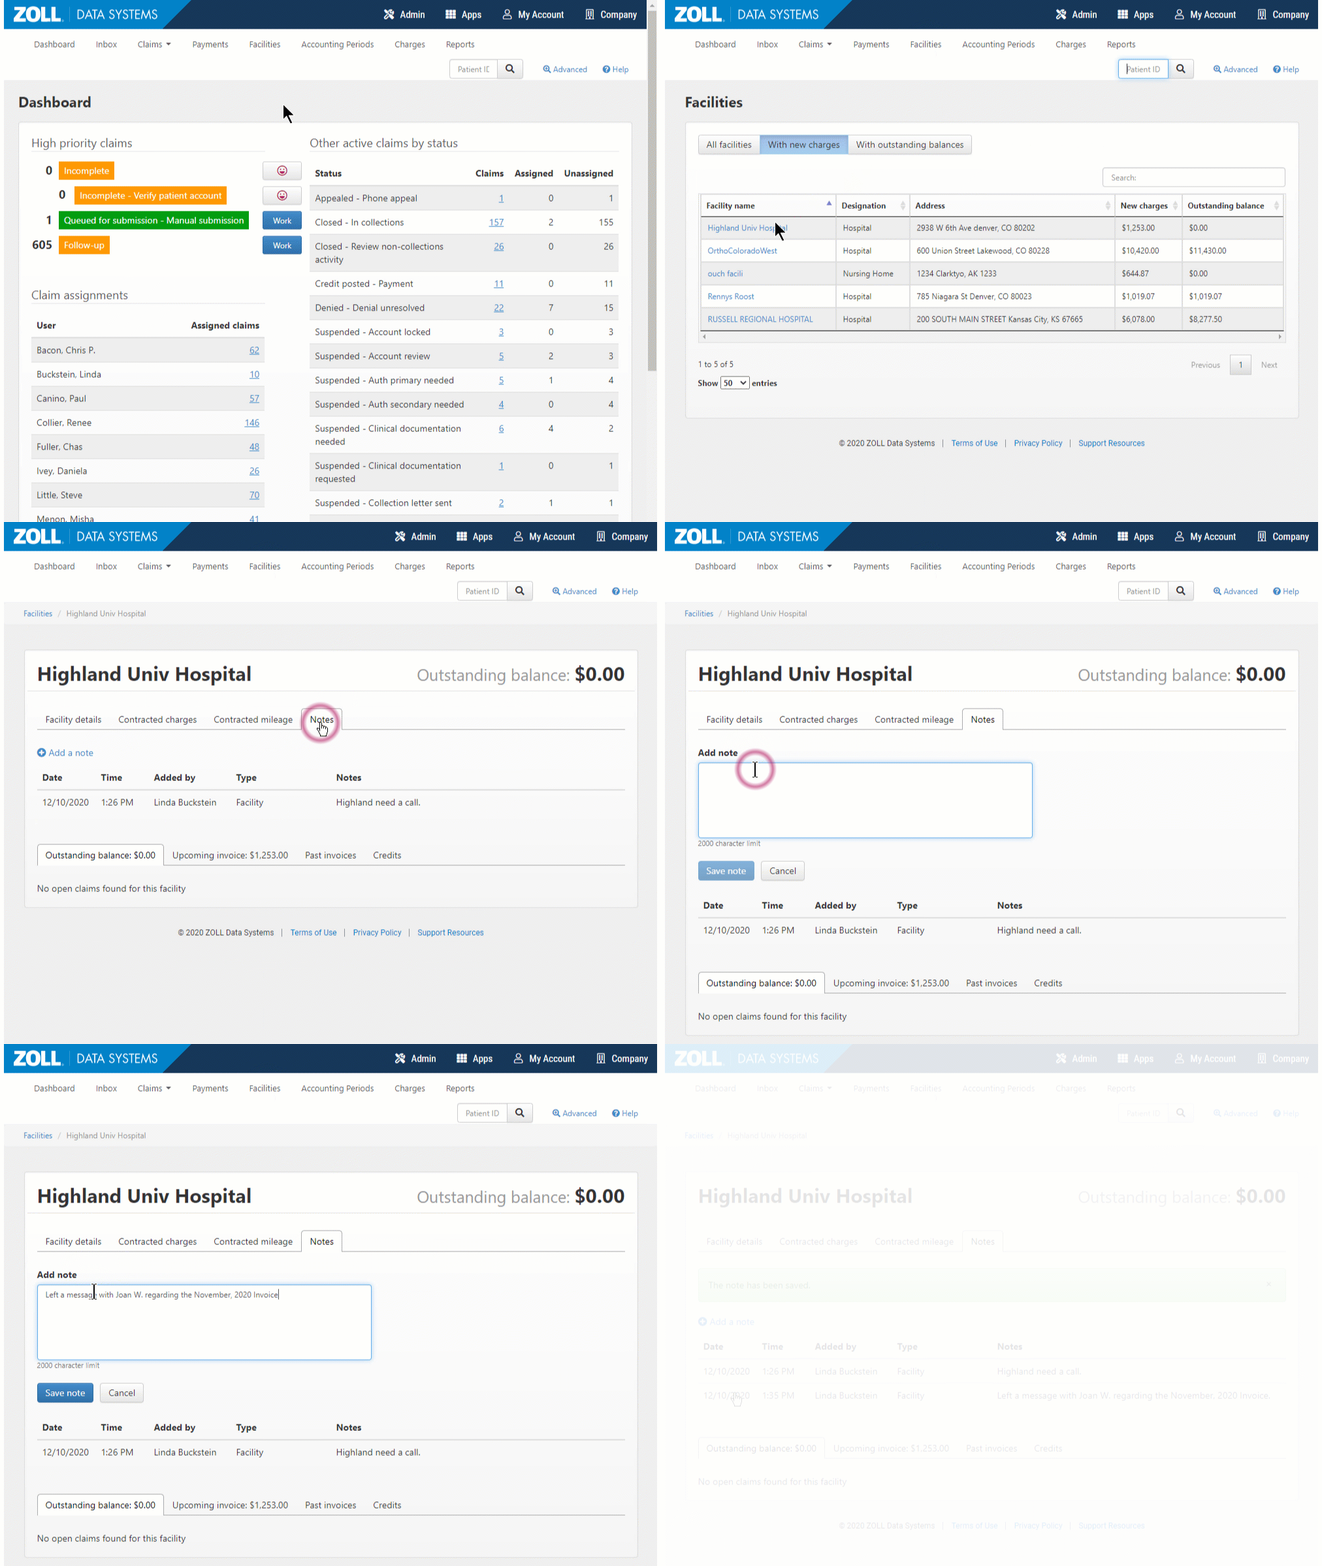
Facility: Click Facilities on the navigation bar. Click the facility name and then click the Notes tab. You can add, edit, or delete a facility note.
Watch the following GIF to add a note.
Delete and edit notes
If you have Standard User permission, you can edit or delete notes that you create but not those created by others. If you are a System Administrator, you can edit or delete all notes regardless of who created them. Any change to a note will result in an entry in the Audit Log.
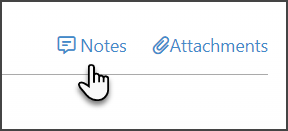
Click the Notes link.
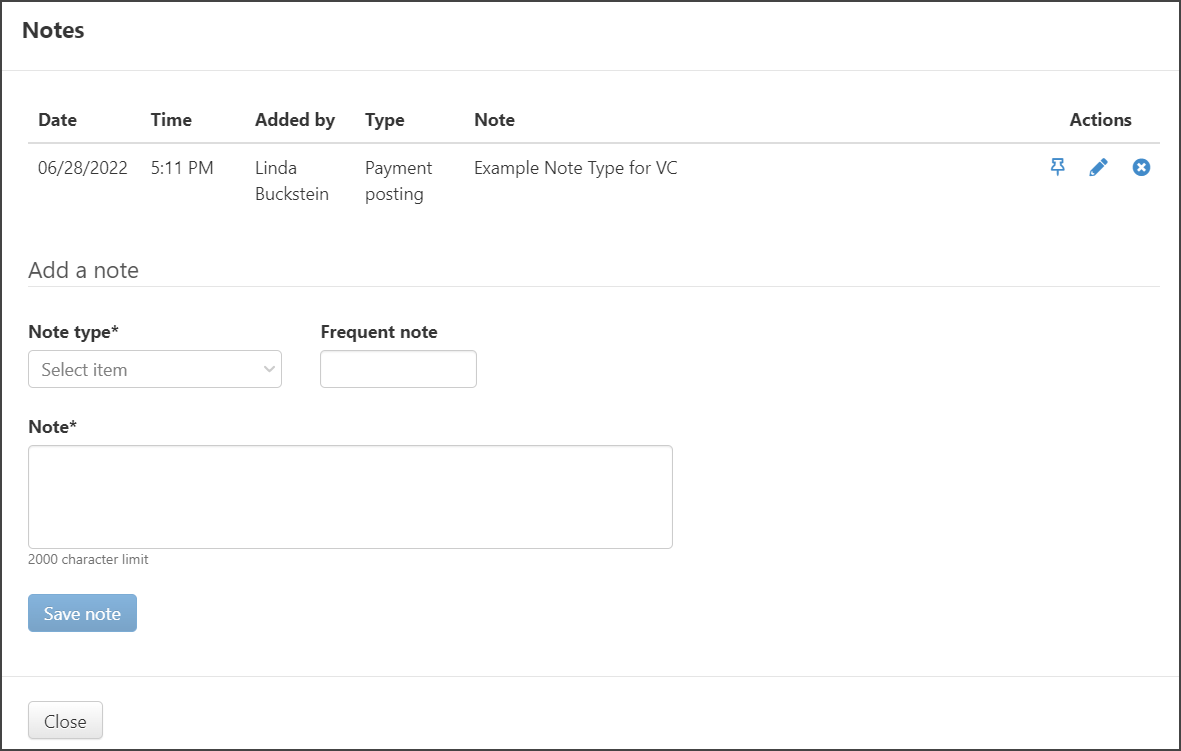
Edit: Click the edit icon  . On the Edit note window, modify the note text and then click Save.
Delete: Click the delete icon ![]() . On the confirmation window, click Delete note.
. On the confirmation window, click Delete note.
Pinned Notes
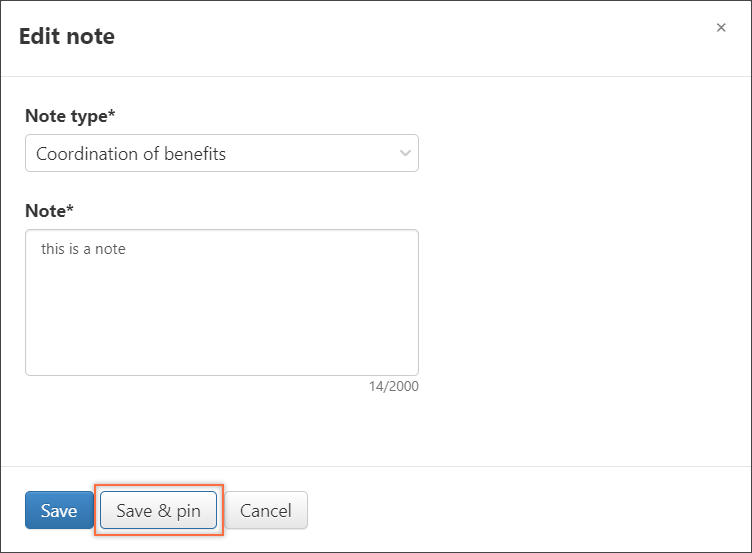
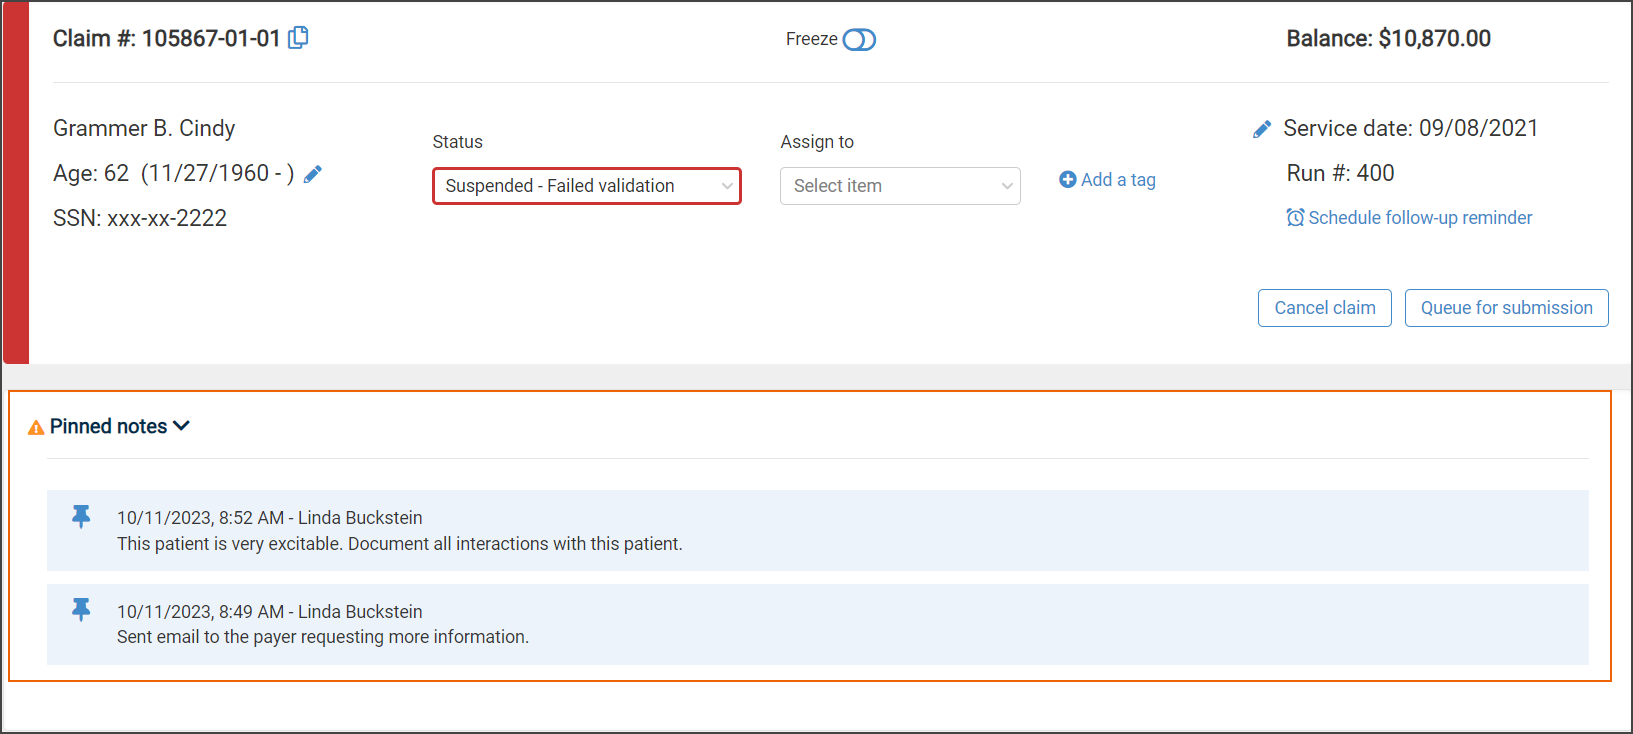
You can pin a note when you create/edit it, or by clicking the push pin under Actions.

A pinned note displays under the claim header every time you access that claim until the time note is unpinned or deleted.
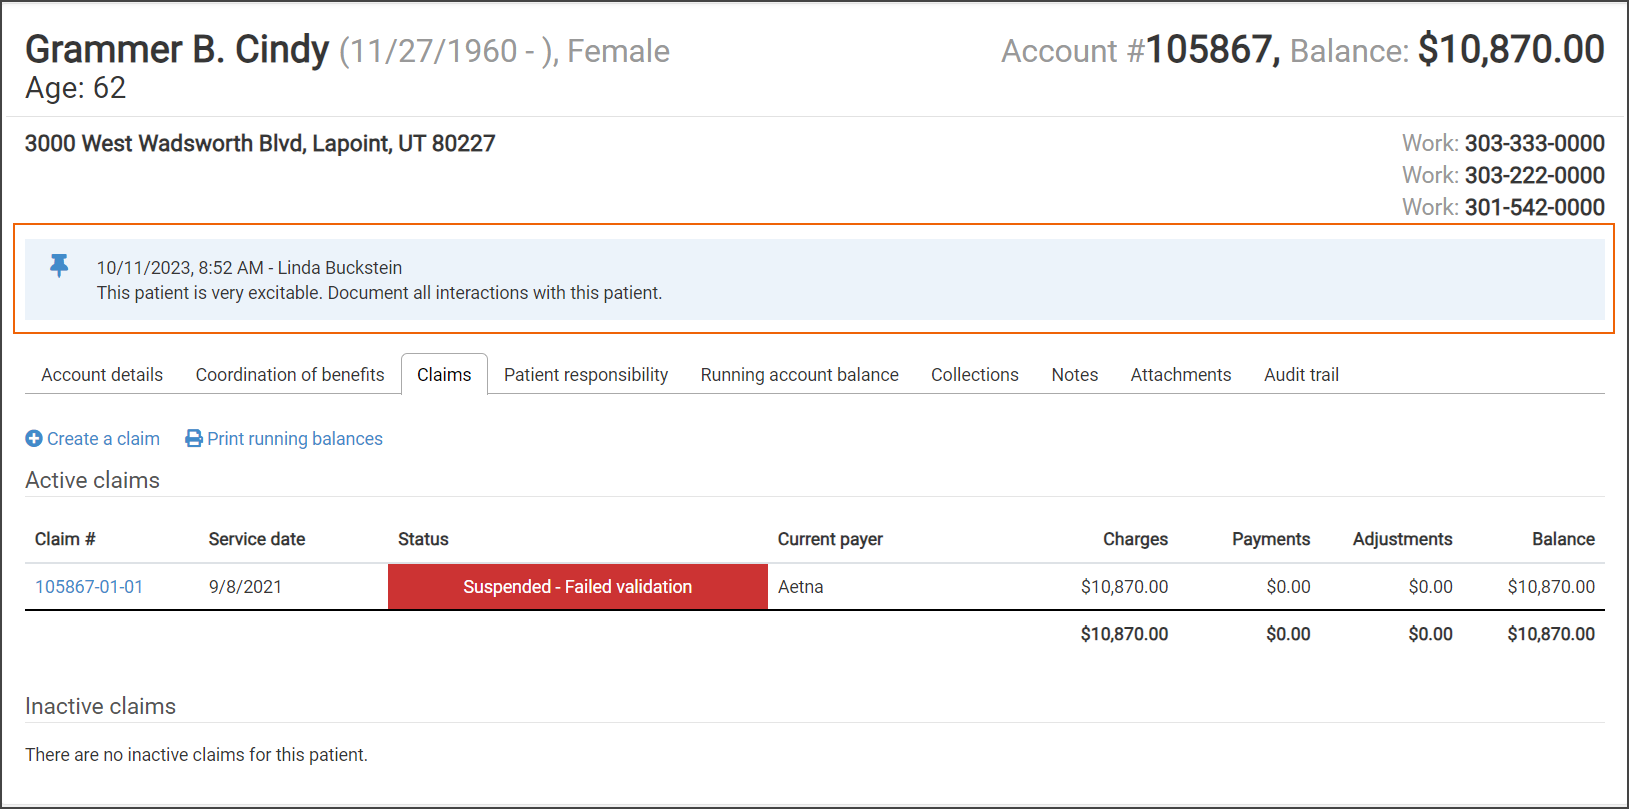
On the Account page, pinned account notes (claim notes only display on the Claim page) will display in their own section directly under the account heading.
To collapse/expand the pinned notes section, click the arrow next to "Pinned notes" as shown in the following figure.

To acknowledge a pinned note, click on the pin icon ![]() . Once you acknowledge a pinned note, it will be temporarily removed from the pinned notes section for the duration of your current session in the claim. However, if you leave the claim and return at a later time, the acknowledged note will reappear in the pinned notes section. Please keep in mind that all notes, whether pinned or not, can be found under the Notes tab.
. Once you acknowledge a pinned note, it will be temporarily removed from the pinned notes section for the duration of your current session in the claim. However, if you leave the claim and return at a later time, the acknowledged note will reappear in the pinned notes section. Please keep in mind that all notes, whether pinned or not, can be found under the Notes tab.
If there are no pinned notes or if all pinned notes are acknowledged or deleted, the pinned notes section will not display.
The acknowledgment is tracked in the claim or account audit trail (depends on if the note was claim or account based).

Frequent notes
Use frequent notes to build a list of notes that you use regularly, assign shortcut keys to each, and then use them in a claim or an account.
Build the list
To start, make a list of notes that you frequently use for both claims and accounts. Then, assign a shortcut key to each. Now, add them to your system.
On the navigation bar, click Settings and then select the Frequent Notes tab.
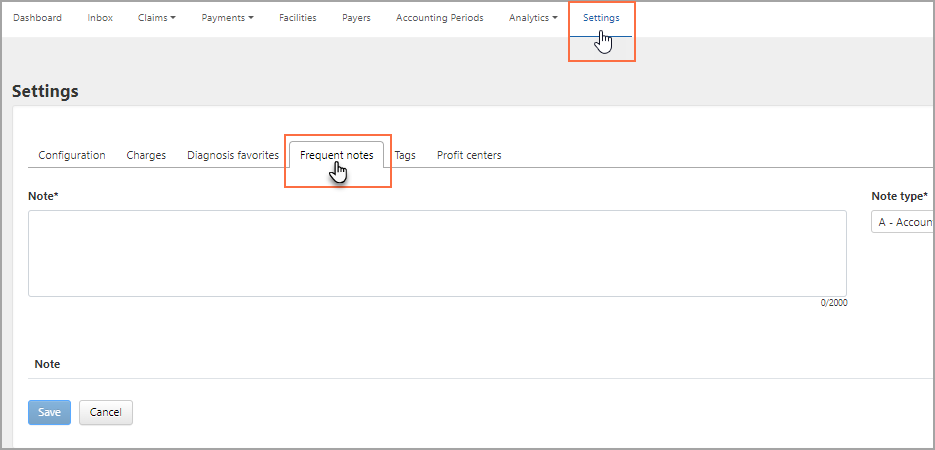
To add a new note, on the top of the page enter information in the following fields:
-
Note field: Enter the note text.
-
Note type: Click this field to select a note type from the list. Pay attention to the letter identifier that displays at the start of each type. If it starts with an "A", then this will be an account note meaning you will only be able to use it when entering notes in the patient’s account. If it starts with "C" then this is a claim note and can only be used when adding notes to a claim.
-
Shortcut: Enter at least three numbers, letters, or combination of number and letters. Special characters are okay, but control keys are not.
-
Click Add note.
The newly added note displays in the list. The list is easy to maintain. If you want to:
-
Change the note content: If you need to change the wording on a note, click the note field and make the modifications. Be sure to click Save at the bottom of the page.
-
Change the note type: Remember – C types are used for claims while A types are used for accounts. Click the Note Type field and select the type from the list. Scroll down to the bottom of the list and click Save.
-
Change the shortcut: Click in the Shortcut field and then change the shortcut. Scroll down to the bottom of the list and click Save.
-
Remove a note: Click the trash can at the end of the note line.
Download the frequent notes list
You can export all your frequent notes to a CSV file. Click Settings on the navigation bar and then click the Frequent Notes tab. Click the Download CSV link. The resulting file will contain the note name, note type, and the shortcut.
Add a frequent note to a claim or account
The ability to add a frequent note to a claim or account appears in all areas where you add notes of those types.
As an example, the following steps apply to adding a note on the Claim or Account page.
-
On the Claim or Account page, click the Notes tab.
-
Click Add a claim note or Add an account note.
Note: On the Claim page, you have the choice to enter notes for a claim and/or an account. On the Account page, you only have the choice to add a note to the account. -
Click the Note type field and then select the type from the list.
-
Click the Frequent Note field and start typing the shortcut key. The note will display under the field.
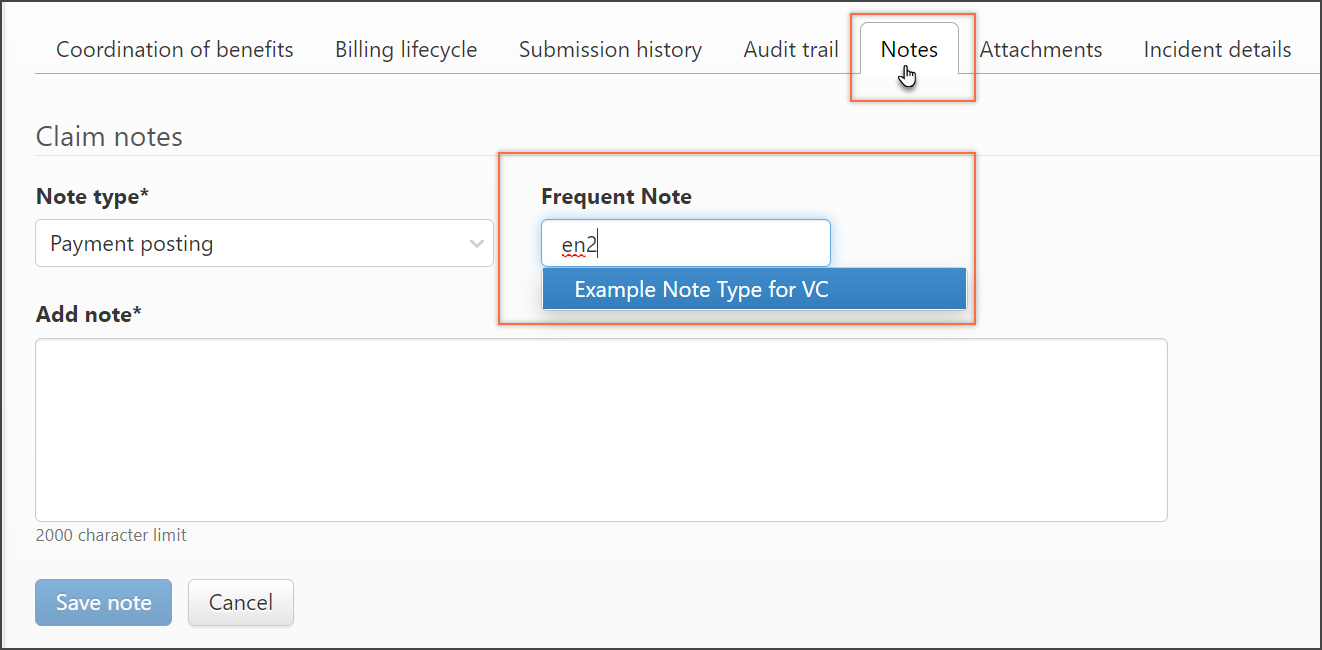
-
Click the note to add it to the "Add note" box.
If needed, you can edit the frequent note.
-
Click Save note.